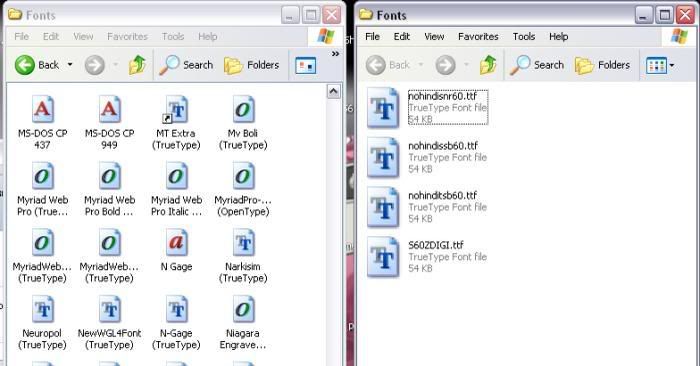
Ok. First you find whichever .ttf font that you want to use. In my case I just went to the font folder on c:/windows/font on my desktop. Pay close attention... what you NEED to do is create a folder on your desktop. Name that folder Fonts. Since you cannot just copy and paste a font from that windows folder, its safer to have both the fonts folder from your windows drive open AND the fonts folder that you just created on your desktop (which should be empty at this point). With both windows side by side, select the font that you would like to use and MOVE it to the other font folder by holding down the control button and dragging and dropping to your new font folder.
From the font folder that you created you can now right click and select copy and move it back to the windows font folder. Once thats done you can close out the windows font folder.
Now at this point you should have your created font folder open with the font that you moved inside. From that one font type you need to create 3 copies. Don't worry about the titles, we will change that later. Right click the font and select copy. From the edit tab on the toolbar select paste. So basically you are copying and pasting within the same folder.
Now its time to rename the files of your font. Open Y-Browser from your device. Select z:/resource/fonts. Here is where you will find the names of the fonts that are preinstalled on your device. Keep in mind that different devices have different font names. So far I've tried this on the N73 and N95 and each device has different font names.
Once you have the correct file names from your device you can now go back into your created folder on your desktop and rename the files. The titles shown above were the font types that are installed on my N95. Now that doesn't mean that this will work on all N95's because the font types might differ by region, especial the APAC region.
Once you have renamed the files you can close the window. Now its time to transfer them to your device.
This next method can be done 2 ways. I suggest using a card reader because after the fonts are installed to the memory card you can no longer use the phone in Mass Storage or Data transfer mode.
The second method is to connect your phone via USB and select Mass Storage or Data Transfer. Once connected and the file manager opens, go to your Resource Folder. This will be your E:/ drive. Open the Resource folder and copy your Fonts folder stored on your desktop to this location. Once the transfer is complete close all windows and go to the USB folder on your phone and select PC Suite mode. The reason that I do this is because it is safer to power off the device once out of Mass Storage or Data Transfer.
Power off your device and power back on... Thats it. !!!
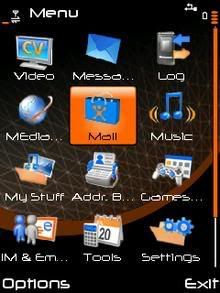
The following is a screenshot of the changed fonts on a N95.
I've attached the fonts that I created for my N95. The name is Neuropol. Try it out on your N95. Please try it out and kindly give a feedback whether it worked on your phone model.


 redpepper007


 / Chinese (Traditional)")


